Home » How to Build Your Own Custom PC in Nepal
Building your own custom PC is an exciting way to get exactly the performance you want, whether for gaming, work, or creative tasks. In Nepal, assembling a PC gives you the flexibility to choose components that fit your budget, needs, and style, while also ensuring easier future upgrades. This guide will walk you through the essentials of building your own PC step by step.
Performance & Personalization: Choose components tailored to your workload or gaming preferences.
Cost-Effective: Avoid paying extra for features you don’t need.
Upgradeable: Easily swap or upgrade parts in the future without buying a new system.
Learning Experience: Gain hands-on knowledge about your hardware.
To build a PC, you will need the following parts:
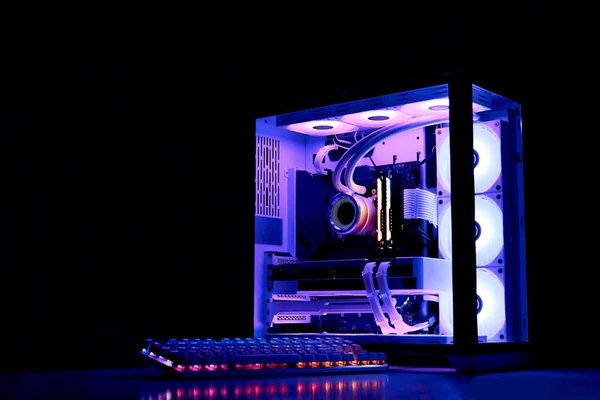
Processor (CPU): The brain of your PC. Intel and AMD are popular choices.
Motherboard: Connects all your components. Ensure compatibility with CPU and RAM.
Memory (RAM): 8GB minimum; 16GB or more for gaming or design.
Storage: SSDs for speed (256GB or more) and optional HDDs for extra space.
Graphics Card (GPU): Crucial for gaming, design, and video editing.
Power Supply (PSU): Reliable wattage to power all components safely.
PC Case: Size and airflow matter for cooling and future upgrades.
Cooling System: Stock CPU cooler or aftermarket coolers for high performance.
Peripherals: Monitor, keyboard, mouse, and optional speakers or headphones.
In Nepal, PC budgets can vary:
Entry-Level: NPR 50,000–80,000 for students or basic workstations.
Mid-Range: NPR 80,000–150,000 for gaming or professional work.
High-End: 150,000+ for top-tier gaming or specialized creative work.
Choose parts that balance performance and cost. Avoid overspending on components that won’t impact your main tasks.
Prepare Your Workspace: A clean, static-free area with tools like a screwdriver.
Install the CPU and RAM: Carefully place the processor and RAM on the motherboard.
Attach the Motherboard to the Case: Use standoffs to secure it safely.
Install Storage and GPU: Mount your SSD/HDD and graphics card properly.
Connect the Power Supply: Ensure all cables go to the correct components.
Connect Peripherals and Cooling System: Fans, CPU cooler, keyboard, and monitor.
Power On and Test: Boot up, enter BIOS, and check that all components are recognized.
Install the Operating System: Windows, Linux, or your preferred OS, plus drivers.
Purchase from trusted local stores or online platforms like Susamarpan for genuine products and local warranty.
Check compatibility carefully (CPU-Motherboard, RAM type, PSU wattage).
Compare prices in Nepal to find the best deals, considering import taxes and shipping.
Keep receipts for warranty claims.
Building a custom PC in Nepal gives you control, performance, and satisfaction that off-the-shelf computers may not offer. With careful planning, research, and attention to detail, you can create a powerful system tailored to your needs and budget.
Gaming is no longer just a hobby—it’s a serious form of entertainment and competition. Whether you’re a casual gamer or a professional eSports enthusiast, having the right equipment can drastically enhance your performance, comfort, and overall gaming experience. Here’s a guide to the essential gaming gear every gamer should consider. 1. High-Performance Gaming PC or […]
In today’s fast-paced world, electronics have become an integral part of our daily lives—from work and study to entertainment and fitness. Choosing the right devices that align with your lifestyle can save you money, boost productivity, and enhance your overall experience. Here’s a guide to help you make smart decisions when buying electronics. 1. Identify […]
Technology has become a powerful catalyst in transforming education worldwide, and Nepal is no exception. From digital classrooms to online learning platforms, modern technology is reshaping how students learn, teachers teach, and educational institutions operate. 1. Digital Classrooms and Online Learning The rise of e-learning platforms, virtual classrooms, and educational apps has made quality education […]
Artificial Intelligence (AI) is no longer a futuristic concept—it’s becoming an integral part of our daily lives, transforming the way we interact with electronic devices at home, work, and on the go. From smart assistants to adaptive appliances, AI is making technology smarter, more efficient, and more user-friendly than ever before. 1. AI in Smartphones […]